Showing posts with label food. Show all posts

Wednesday, 2 April 2014

the "Magic Factor"


When times get tough, the tough get baking (or organizing the kitchen cabinets). Is that how the saying goes? Whenever I had a test in grad school, or a looming CPA exam, I always seemed to find plenty of time to bake something ambitious . . . or color code my closet. This was part procrastination/ distraction and partially because those activities are orderly, methodical, in other words, in a whirlwild of stress and anxiety, therapeutic.Yesterday was a long day, so what choice did I have but to sweeten it with some dependable double chocolate banana bread?! I saw the recipe on smitten kitchen, and with 2 extra big overly ripe bananas in the kitchen and the ingredients in the pantry, I couldn't say no. The recipe is really easy, you don't need a mixer, or even a second bowl. I stuck to it apart from one small exception: coffee. I remembered watching an episode of Barefoot Contessa called the "Magic Factor" in which she reveals several ingredients that enhance the flavors of certain recipes. Lemon zest brings cheese danish to life, tarragon makes chicken salad sandwiches more delicious, and coffee deepens the flavor of chocolate cake! In the episode, Ina makes 2 batches of each recipe to taste to difference with and without the magic ingredients. I didn't make two breads, but I can say the bread was intensely chocolatey and comforting, just as I'd hoped!


Double Chocolate Banana Bread (adapted from Smitten Kitchen blog)
2 very large very ripe bananas
1/2 cup (115 grams) butter, melted
3/4 cup (145 grams) brown sugar
1 large egg
1 teaspoon pure vanilla extract
1 teaspoon baking soda
1/4 teaspoon table salt
1/2 teaspoon ground cinnamon 
1 teaspoon instant coffee
1 cup (125 grams) all-purpose flour (I used half bread half cake flour)
1/2 cup cocoa powder
1 cup (about 6 ounces or 170 grams) semisweet or bittersweet chocolate chunks or chips

Heat your oven to 350°F. Butter a 9×5-inch loaf pan, or spray it with a nonstick baking spray.
Mash bananas in the bottom of a large bowl. Whisk in melted butter, then brown sugar, egg, and vanilla. Place baking soda, salt, cinnamon, coffee, flour and cocoa powder in a sifter or fine-mesh strainer and sift over wet ingredients. Stir dry and wet ingredients with a spoon until just combined. Stir in chocolate chunks or chips.
Pour into prepared pan and bake 55 to 65 minutes (mine only lasted 50 minutes), until a tester or toothpick inserted into the center of the cake comes out batter-free. Cool in pan for 10 to 15 minutes, then run a knife around the edge and invert it out onto a cooling rack. Serve warm or at room temperature.
The banana bread will keep for up to 4 days at room temperature.

I found another beautiful banana bread recipe here.

Tuesday, 1 April 2014

from the weekEND

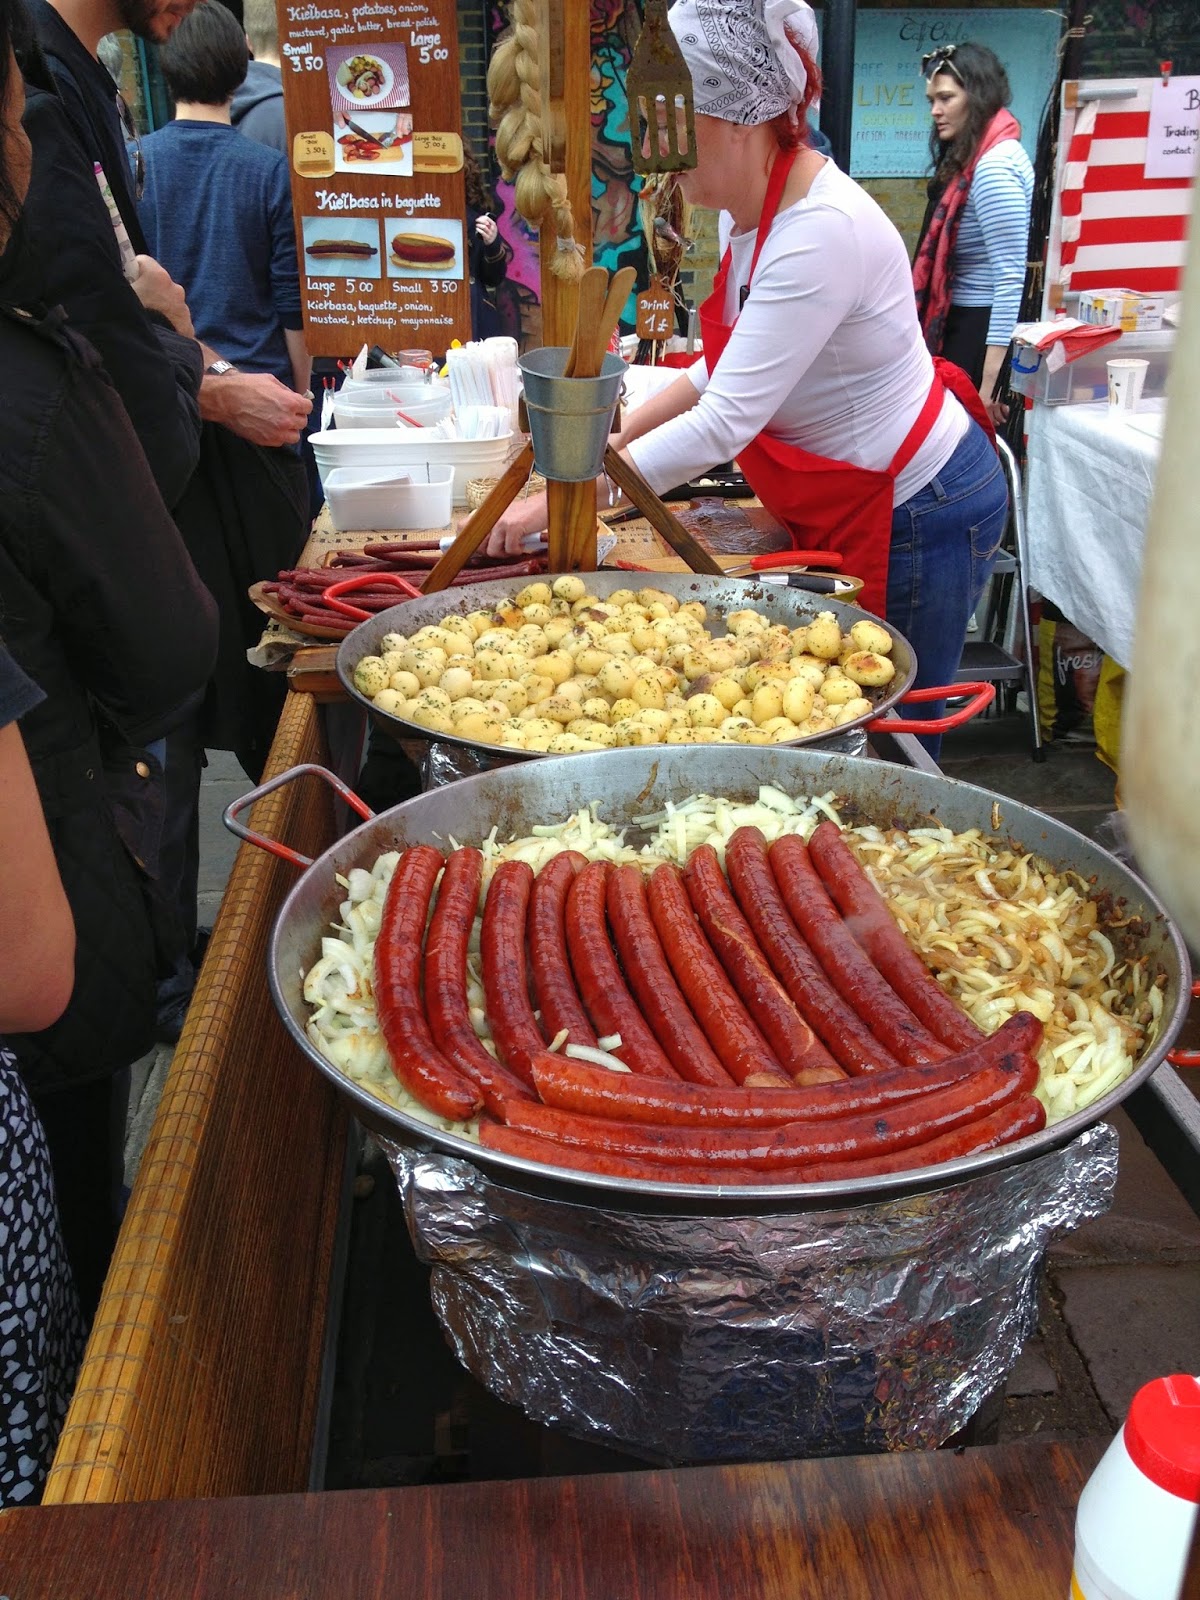
Here are a few photos from our weekend (pronounced weekEND in the UK). It was spring/ summer like weather- almost 70! Saturday we stopped in Windsor for some swan sightings, fish and chips on a picnic table and an outside ale. Sunday we went to the market in Camdentown- the birthplace of British punk! You know a place has turned mainstream when there's a Starbucks right in the middle of it :) but it was great. We saved our money for the important stuff- the food! There were outside stalls with Argentinian steak sandwiches, Polish pierogis, French duck confit burgers, and Peruvian cuisine, but we opted for kielbasa and buttery potatoes with spicy mustard and grilled onions, a Turkish grilled chicken kebab, and Vietnamese stir-fried noodles! We walked around the market and had a pint by the river and then stopped by Primrose Hill in Regent Park to burn off a couple bites of our International lunch. There was a man whose outfit matched his dog, someone flying a kite, and lots of people on blankets enjoying the cloudy but mild day and beautiful view.


Friday, 21 March 2014

Burgerfest 2014


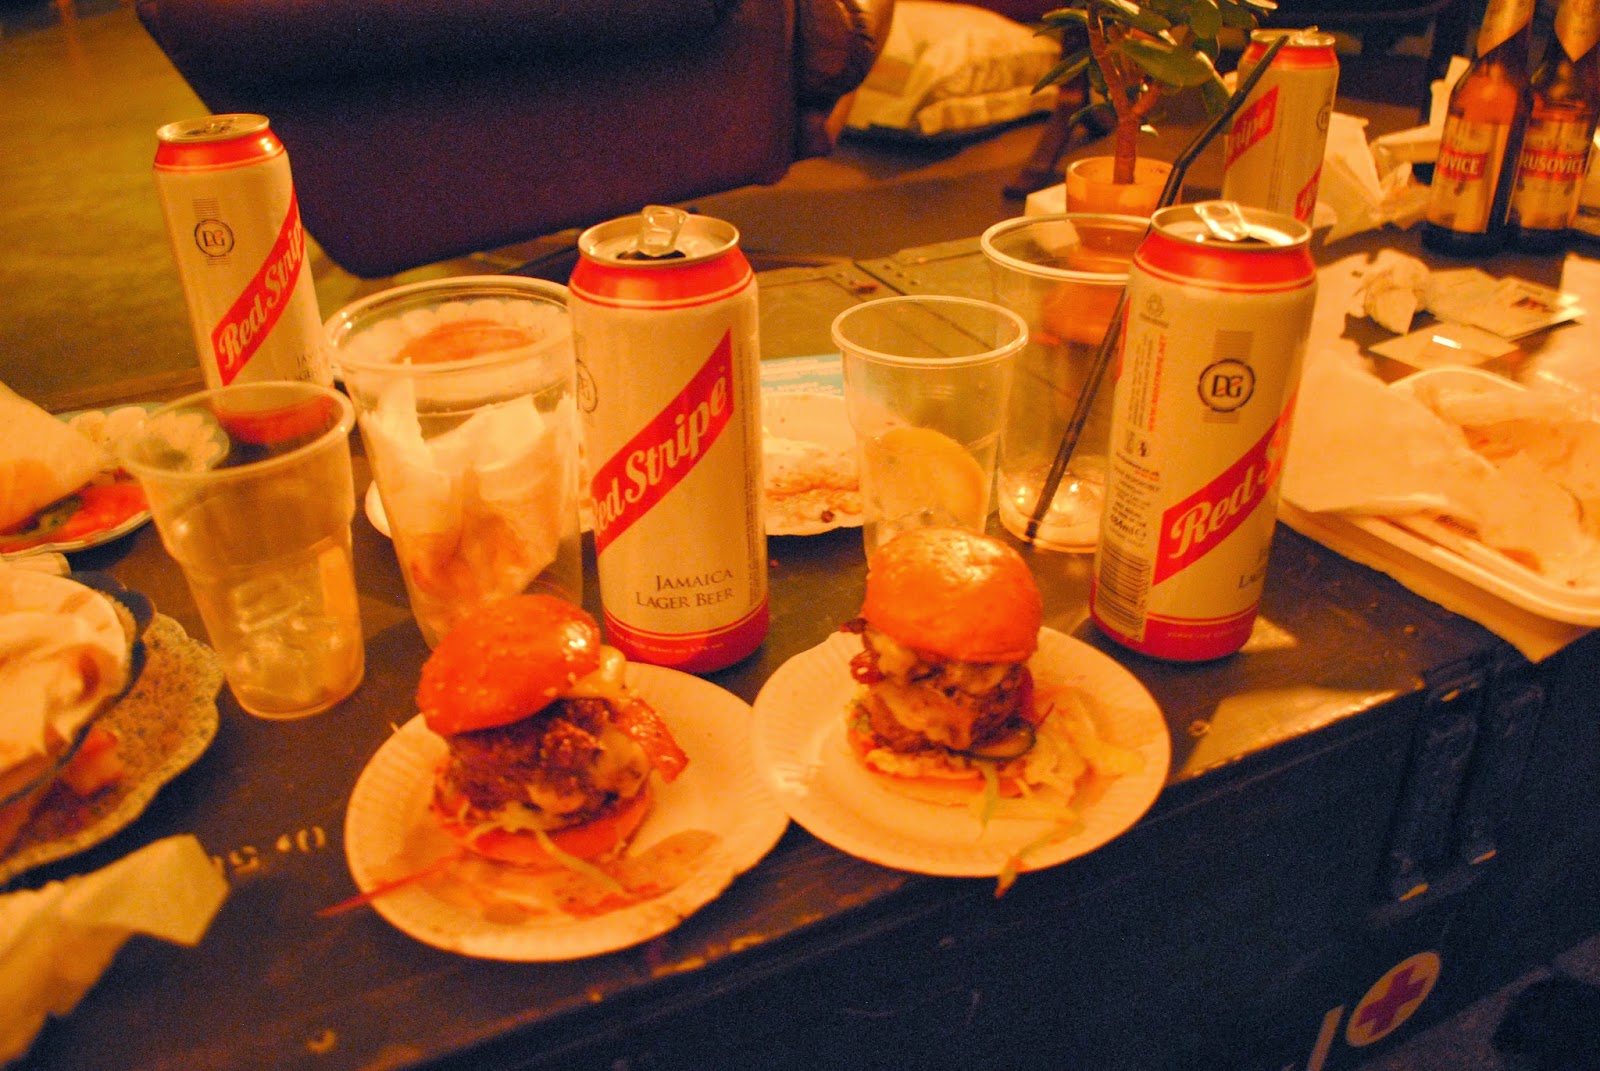
Last Saturday Bruno and I went to a Twenty Something London event for his birthday, since his favorite food is . . .  cheeseburgers! I'm guilty of being one of those people who gives gifts I'd like to receive myself, and this is no exception. Whenever I act crabby close friends literally ask, "Meg, are you ok? Do you need a cheeseburger?" (I think I need this shirt). It was somewhat dangerous to marry someone who shares my love of a perfect burger, like, we end up eating them for every meal, but it made for a clear (if somewhat self-serving) birthday present choice :).


Burgerfest was held in an artist studio space in East London, a big warehouse filled with the different tents/ stands/ an airstream food truck for each burger joint, and another room with a dj, bar, picnic tables and retro furniture. The bar ran out of beer but someone went out for cases of Red Stripe, the music was on point, and the warehouse was full of smoke from the grills and twenty-somethings glad they'd worn their stretchy jeans. There were 5 burgers and a burger cupcake w vanilla french toast "fries"! I don't think either of us will be grumpy for a long time! x


Thursday, 13 March 2014

Happy Birthday, Bruno!


Today was my husband's birthday! Like many people with traumatic, too sweet, too dry cake experiences, he doesn't like traditional birthday cake, so I made a cheesecake instead. It was my first time making it, so I can only attribute my success to a good recipe, which I dutifully converted into metric measurements and followed step by (another?!) step. Thanks to my friend Julia who got us these adorable measuring cups from Anthropologie for our wedding! The littlest one's beak broke during shipping, but I think it makes it even cuter. So sweet, Jules! The hardest part of this recipe was tasting the batter -creamy, sweet, lemony, smooth- and then having to wait an hour and a half during baking, another hour in the oven, another hour out of the oven, and then overnight while it chilled in the fridge to try a slice. BUT guess what?? It didn't crack! And while it looked more like flan straight out of the oven, it cooled into a big, fat, unmistakable cheesecake.


Marscapone Cheesecake:
Adapted from Dorie Greenspan via Cup of Jo  

Crust:
1 ¾ cups cracker crumbs (the recipe calls for graham crackers, but as they're not widely available in the UK, I used digestive cookie crumbs!)
2 tbsp. sugar
pinch salt
4 tbsp. butter, melted

Preheat oven to 350º (about 180 C). Butter the inside of a 9-inch springform pan, and wrap the bottom of the pan with aluminum foil and place in a roasting pan. Be sure to wrap the bottom of the pan well with foil as mine spring a little leak in the water bath! D: 

In a medium bowl, stir together the cookie crumbs, sugar and salt. Add the melted butter and stir well to cover all the crumbs. Pour the crumb mixture into the prepared pan and use your fingers to press gently into an even layer on the bottom. The recipe calls for pressing the mixture halfway up the pan, but I'd recommend just on the bottom the next time I make this. The original recipe also calls for freezing the crust for 10 minutes while the oven heats, but I skipped this step for time- and lack of freezer space- sake.

Slide the pan into the oven and bake until the crust is lightly browned, about 10 minutes. Turn the oven down to 325º (about 160 C).

For the filling:
32 oz (900 grams) cream cheese, room temperature
1 ¼ cups sugar
½ tsp. salt
2 tsp. vanilla extract
½ tsp. lemon zest
4 large eggs, room temperature
1 ⅓ cups (about 315 grams) mascarpone cheese, room temperature

Using a stand mixer or an electric hand mixer, beat the cream cheese in a large bowl until it is light and very smooth, about 4 minutes. 

With the mixer running on medium low speed, slowly pour in the sugar, then the salt. Beat for 3 more minutes. Add the vanilla extract and lemon zest. 

Add in the eggs, one at a time, and beat for a  minute after each egg. Scrape down the bowl, reduce the speed to low. Add in the mascarpone and mix thoroughly. Pour the mixture into the prepared crust. The batter will come to the top of the springform pan. I tried to make it look pretty, but it settles evenly during baking so it didn't matter! 

Place the springform pan into a roasting pan and place on the center rack of the oven. Fill the roasting pan with enough very hot or boiling water to come halfway up the sides of the springform pan. Close the oven door and bake the cheesecake until it is lightly golden on top and the filling is set, but still slightly wobbly in the center. The original recipe called for 90 minutes of baking time, but my cheesecake was lightly browned in 70 minutes, and still VERY wobbly. 

Turn off the oven and prop the door open slightly with a wooden spoon. Let the cheesecake cool for one hour in its water bath. After an hour, gently remove the roasting pan from the oven and lift the springform pan from the water. Carefully remove the foil from the bottom of the pan and set the pan on a cooling rack. Run a knife around the top edge of the cheesecake to release it from the pan. Let the cheesecake cool to room temperature, then cover the top with plastic wrap and chill overnight. 

I was so anxious about my big flan-looking blob with a water bath leak, but it was creamy and light and delicious! I made a topping with a package of strawberries and 1 cup each water and sugar, but it was great on its own. Happy Birthday, love! xoxo